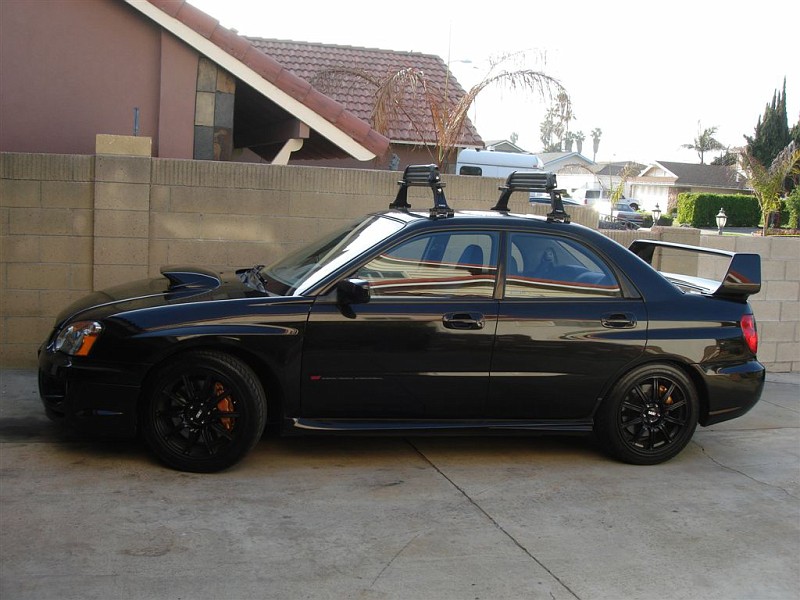
This is something I have been working on for awhile. I have a 2004 Subaru WRX Impreza STi, it is my daily driver, and dependable ride. I frequent the mountains, like to ride bikes here and there, and like to just use my car to its fully capability. So this brings me to the purpose of this post.
I like to run a roof rack on my car. Personal preference is function over form, but after awhile things start to look hokey and just not refined. Originally, I had the EDM Subaru rack for my car, which was specifically made for the European Subaru Imprezas.
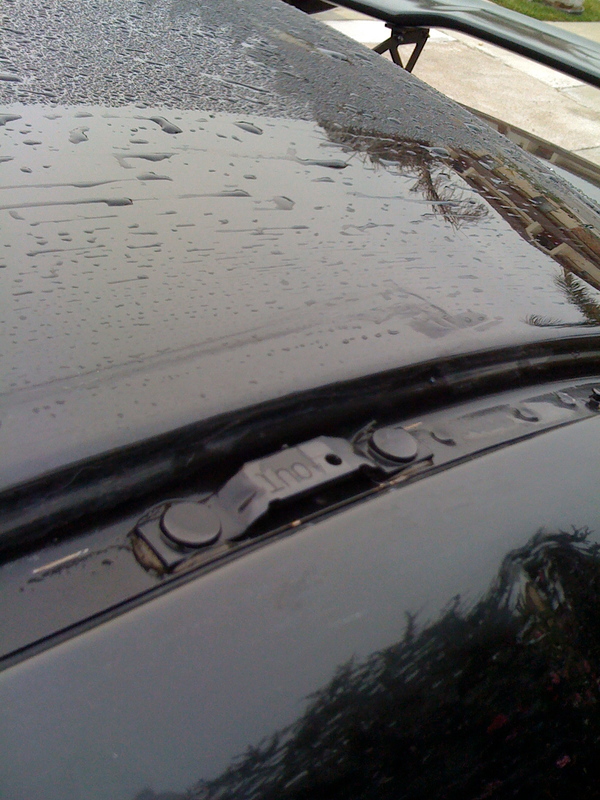
A little known fact about Imprezas (2001-2007), is that they are all made with hidden brackets that allow for the provisions of the EDM roof rack. The EDM rack was tall, ugly, and noisy, although it fit perfectly without damaging my roof, I hated it. I then went to a different route, by modifying a Yakima rack that uses Q-clips, so that the clips attach to the existing "hidden" brackets, and not the window sill edge of the car. Here you see the typical set up and mine, modified.

So this brings us to my idea, which was to be able to use the newer style Yakima Landing Pad and Control Towers with the older type Imprezas. These are the same type of racks used on the 2008+ Subarus, as well as BMW and Mercedes. The newer cars have a threaded hole in the roof frame which allow for the Yakima Landing Pads to attach to. My idea then came to fruition by way of a DIY I helped collaborate. The original was intended for a Thule set up, but I did all the research I needed for a Yakima set up. Here is the DIY post topic for that on my local forum:
http://forums.nasioc.com/forums/showpost.php?p=29282963&postcount=35
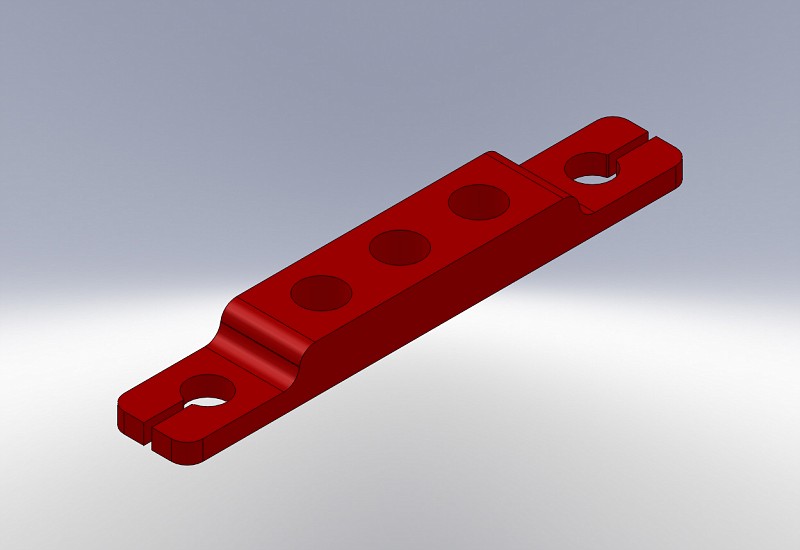
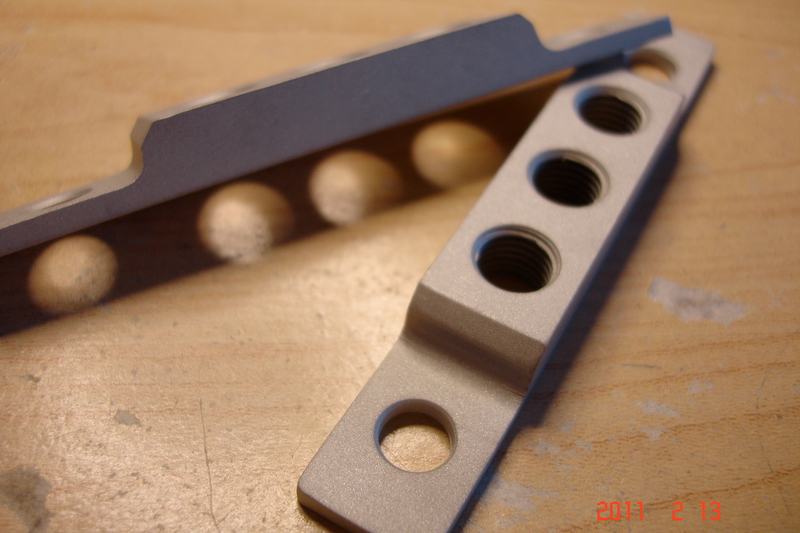
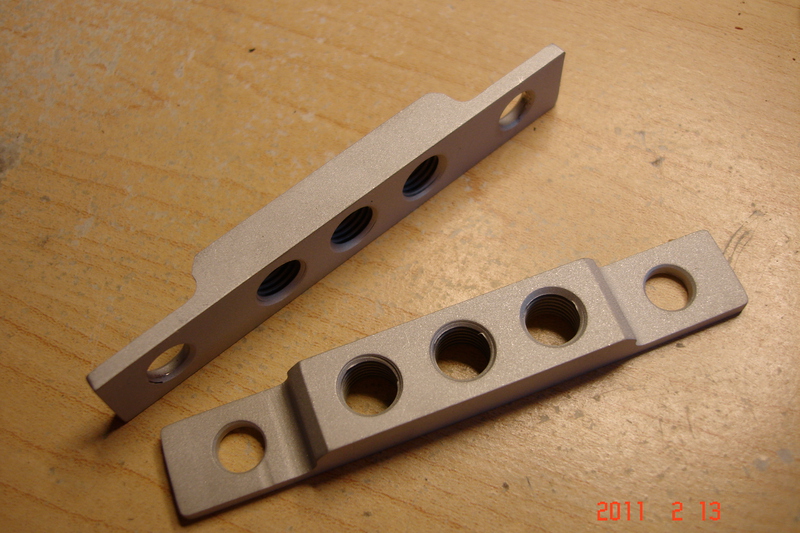
After realizing the pitfalls of drilling and tapping a fairly thin piece of mild steel, I went ahead and used Solidworks to CAD up a simple bracket. The bracket basically replaced the stock bracket and allows for a secure and strong alternative to other options. Which leads me to this, stock bracket on the car, and the CAD model bracket:
http://forums.nasioc.com/forums/showthread.php?t=2100812
I decided to enlist in some people I know to manufacture them for me on a limited run to see how they will do. They are strictly vehicle specific, but if you're me, and you love your Subaru, these are perfect for a strong alternative to typical roof rack set ups. SOOOOO... here are the prototypes! They are in raw form. The final ones should be made from 7075 Aluminum for strength, and probably anodized black or clear. They will include hardware, silicone, and you just reuse the nuts on your brackets. To get to them, you have to pull down portions of the headliner but it shouldn't be too difficult. These are specifically made for Yakima Landing Pads, using M8 bolts they provide in the kit. Thule kits have a different set up that isn't as robust, and don't look as streamlined. Final production versions will probably have only 1-2 threaded holes for to be able to vary the distance between towers, this minimizes cost of tapping an additional hole as well. Here are the pics of the brackets alongside the OEM flimsy one.

Please contact me via email if you're definitely interested. I cannot technically sell these on my forum since I am not a vendor, but we can work something out. My email is posted all over the place in this blog. Once I test fit these on my car, I will give the word to get them made, and it will be done in no time. I am thinking end of February. The car is currently in the shop, so I cannot test-fit them. These are going to probably cost around the same as 2 sets of Yakima Q-clips, so they are definitely affordable. Thanks for reading!
Hectordtruong@gmail.com